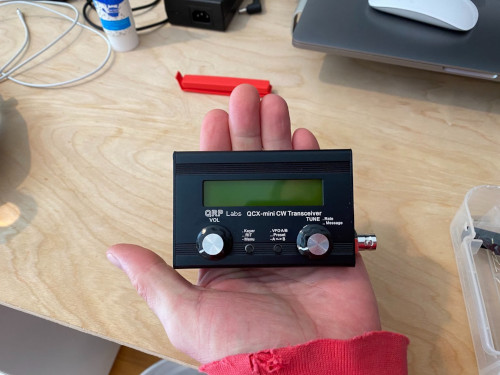
QCX mini build
I recently received and built a QCX mini kit from QRP-Labs. It is a single band Morse code radio that comes with a printed circuit board (PCB) with a set of SMD components pre-soldered, and a set of through-hole components that I had to assemble and solder to the board. It took me a few hours to get it right, and I did make a few mistakes along the way. Most notably, I found two PCBs in the package, and was thinking of just a packaging mistake. It turned out that one of the boards was actually not QC tested, and one of the SMD operational amplifiers that are used in the radio was soldered to the board rotated by 180 degrees.

I unfortunately only realized that after putting together the whole kit, and trying to find the error for quite some time. Hans from QRP-Labs was incredibly helpful and sent me another board and the remaining parts so that I could build a working radio.
I had also made a mistake while winding the T1 toroid; my mistake was to wind in the opposite direction of what was depicted in the assembly manual. That should also work, however of course I would have had to reverse the wires when soldering them to the board also, which I failed to do. I fixed it by re-winding and just using the same direction as in the manual. That makes it much easier to fit the wires into the respective holes in the board. I would recommend following the manual exactly.
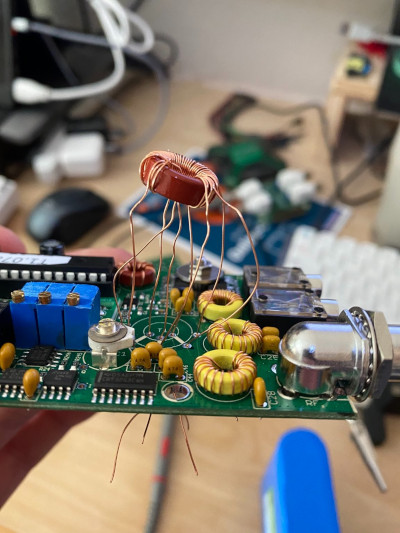
The first power output was not very high, somewhere below 1 Watt. By adjusting some of the toroids’ windings as described in an excellent youtube video from QRP-Labs, I was able to get about 5 Watts output at around 13 Volts at the input.
When it is done, the radio is incredibly small and really nice to use. I very much recommend the optional metal case, it is very sturdy and well made. I made a few contacts with the QCX mini and I am looking forward to making more.